How To Spot A Milky Diamond In 360 Degree Video

By Josh Allen, Co-Founder of YourDiamondGuys.com. Fifth generation diamantaire with 30+ years in the global diamond trade. Former supplier to Tiffany & Co., Cartier, and Harry Winston.
Slow the clip down. Watch the facet edges, not the sparkle count. A transparent diamond creates clean boundaries and organized contrast. A milky one blends those boundaries into fog.
I have rejected stones from ten seconds of honest video and approved stones after a seller refilmed them properly. The video can answer the question, but only when you know which parts of the production are trying to fool your eye.
For a natural diamond, start with GIA and then inspect the actual stone. GIA says a grading report starts the evaluation but the buyer still needs to see the diamond, including the fluorescence field and the visible result rather than a report label alone.
What Should You Know First About Spotting A Milky Diamond In 360 Video?
Look for soft facet junctions, washed out contrast, foggy areas that stay in place, a center that never becomes crisp, and a veil that persists through rotation. Compare the diamond with the holder, background, and a known clear stone to rule out focus and compression.
Use low UV neutral light for the baseline. Add daylight when the report shows Medium, Strong, or Very Strong fluorescence. A blacklight clip is not a transparency test.
Pair this screen test with Diamond Fluorescence 101 so a poor video does not become false proof about fluorescence.
Start With Facet Edge Sharpness
Pause the video face up. Find the boundary between a bright facet and a dark facet. That line should look sharp when the camera focus and resolution are good.
As the stone turns, crisp boundaries switch on and off. Milkiness softens the transition, as if the facet pattern sits behind thin tracing paper.
The milky, hazy, and cloudy definitions help you describe whether the softness is broad, zoned, greasy, or inclusion driven.
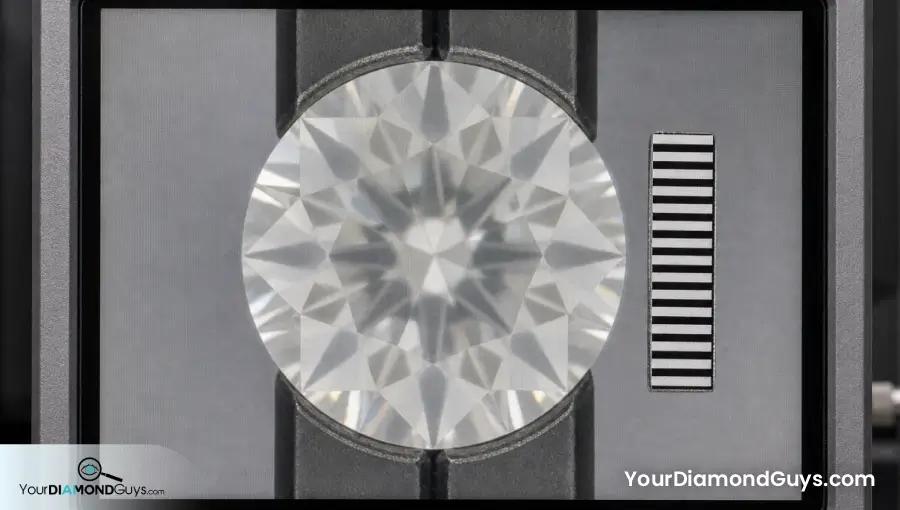
Watch Contrast Instead Of Flash
Bright pin flashes can survive in a hazy stone. They come from individual polished facets catching a hard light. Do not let three sparks override the rest of the face.
Watch whether dark and bright areas stay distinct through the rotation. A sleepy stone has weak switching and a low contrast wash. A cut problem can create a similar result, so inspect the facet edges and report together.
The diamond lighting guide explains why jewelry spotlights and direct camera lights make almost every polished diamond look active.

Use The Background Test
A transparent step cut can let the background show through in certain angles because of windowing. That is different from a milky veil. Brilliant cuts should still show clear pattern boundaries against the background.
Ask for light gray, dark gray, and skin toned backgrounds. Fog that remains across all three deserves concern. Softness that covers the holder and background points toward focus or compression.
Keep zoom reasonable. Extreme magnification exposes dust, focus breathing, and pixel smoothing that nobody sees at normal distance.
| Video clue | Possible diamond issue | Possible video issue |
|---|---|---|
| Soft facet edges only on stone | Reduced transparency | Focus placed on holder |
| Whole frame looks soft | Unclear | Compression or missed focus |
| Foggy zone stays fixed | Clouds, graining, or strain | Reflection if it changes with light |
| Hard flashes over a soft face | Haze can still be present | Spotlight distraction |
| Milky look disappears after cleaning | Surface contamination | Dirty holder or stone |

Check For Lighting And Camera Traps
Front lighting creates white glare that can wash out the crown. Overexposure clips facet detail. Low contrast grading makes the entire image gray. Aggressive noise reduction smears fine edges.
Ask for a slow rotation in diffused light with exposure locked. A neutral reference card in frame shows whether white balance changes. The diamond should not be the only object you can inspect.
The root causes of haze guide helps separate camera bloom, dirty surfaces, clouds, graining, strain, and weak cut.
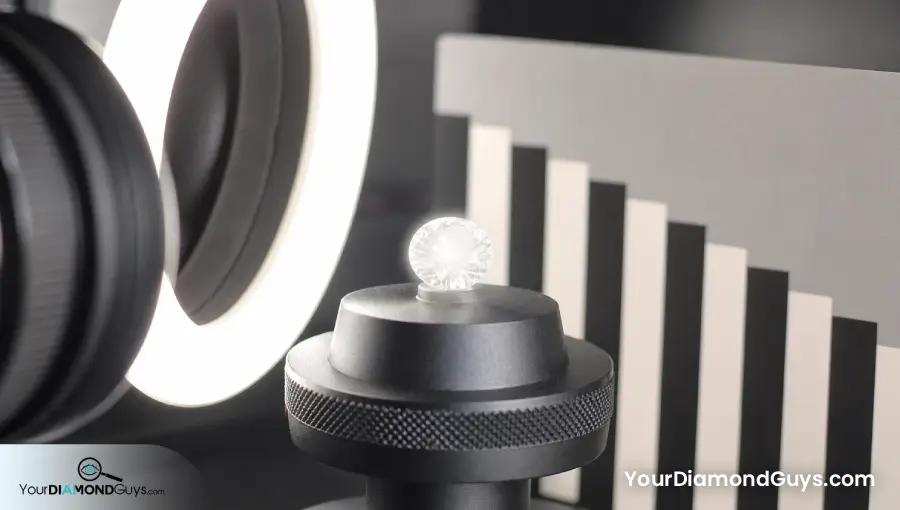
Match Video Clues To The Report
Read the clarity characteristics, plot, comments, polish, symmetry, and fluorescence. Widespread clouds, clouds not shown, internal graining, and stronger fluorescence each change the next question.
Use the report clue guide before contacting the seller. Then send the exact retailer questions that fit the evidence.
When fluorescence is stronger, request an indoor baseline and a daylight clip. The fluorescence harm guide shows how to tell whether softness tracks UV exposure.
- Pause face up at full resolution.
- Inspect bright to dark facet boundaries.
- Watch a slow turn, not a fast spin.
- Compare the holder and background for focus.
- Read the report before naming the cause.
- Request a clean refilm when any variable is weak.
How Does Spotting A Milky Diamond In 360 Video Affect A Real Buying Decision?
A 360 video is a screening tool. It can earn the diamond a closer look or remove it from the list. It cannot always identify whether a foggy zone comes from clouds, graining, strain, or fluorescence.
That is enough. You do not need to solve the gemology when the stone visibly lacks transparency. You only need to avoid blaming a good diamond for a bad video.
What Does A Real Spotting A Milky Diamond In 360 Video Example Look Like?
A listing video shows a round diamond with soft arrows and white bloom. The holder edges look equally soft. A second locked exposure clip arrives after cleaning, and both holder and diamond become crisp.
Another diamond stays foggy while its holder remains sharp. The center never gains clean contrast through a slow rotation, and the report comments mention clouds not shown. That stone leaves the list.
Which Spotting A Milky Diamond In 360 Video Mistakes Should You Avoid?
- Counting sparkles instead of reading facet boundaries.
- Judging from a fast automatic spin.
- Calling whole frame blur a diamond problem.
- Ignoring cleaning, focus, exposure, and compression.
- Trying to diagnose the root cause when visible haze already settles the buying decision.
What Should You Ask About Spotting A Milky Diamond In 360 Video Before Buying?
- Can you send the original full resolution video?
- Can you clean the stone and lock camera exposure?
- Can I see a face up pause and slow tilt?
- Can you use neutral and skin toned backgrounds?
- Can you film ordinary indoor light and daylight for stronger fluorescence?
Affiliate disclosure: Some retailer links are affiliate links. If you buy through one, Your Diamond Guys may earn a commission at no extra cost to you.
Where Can You Compare Evidence For Spotting A Milky Diamond In 360 Video?
Use Ritani and Blue Nile as comparison tools, not automatic recommendations. Compare full rotation videos with consistent focus, exposure, background, and lighting, then judge facet edge sharpness, contrast, foggy zones, report clues, and the seller's return terms. The actual diamond has to earn the yes.
What Is The Buyer Recommendation On Spotting A Milky Diamond In 360 Video?
Trust crisp facet edges, organized contrast, and a clean matched video. Distrust glare, speed, and isolated sparks.
If the retailer cannot produce a video that separates the diamond from the camera problem, do not buy the uncertainty.
Use the diamond fluorescence guide to connect spotting a milky diamond in 360 video with intensity, color, transparency, lighting, and the complete buy or skip path.
If you want another set of eyes on the stone, book your free consultation with Your Diamond Guys.
Crisp vs. Milky: Can You Spot the Difference?
Questions? Reach out directly for a free consultation, or drop them in the Diamond Buyers Academy community — Rob and Josh answer personally.
Questions Buyers Ask Us
*Some links on our site may earn us a small commission at NO EXTRA cost to you, helping us keep our content free*